
DIY Burlesque How to Make a Set of Ostrich Fans
Ostrich feather fans are one of our absolute favourite burlesque props to perform with. We love the way they look, the way they feel, and the confidence they bring to the stage. They are elegant, versatile, and incredibly beautiful, allowing performers to create dramatic shapes, tease, and storytelling through movement.
Ostrich fans are also one of the most expensive burlesque props you can buy, with high-quality professional sets costing £600 or more. Luckily, there are a few tricks of the trade that can help bring the cost down, making it possible to own your own stunning fan set without spending a fortune.
Here is how you can make your very own set of ostrich fans at home.
Choosing Your Feathers
Decide what colour feathers you would like to use. Online marketplaces such as eBay are a great place to look, as there are many colours available at affordable prices. If you would like something a little different, you can also use alternative feathers such as peacock or pheasant feathers, which also come in a wide range of colours.
We sell fan staves for £25 per set of nine staves.
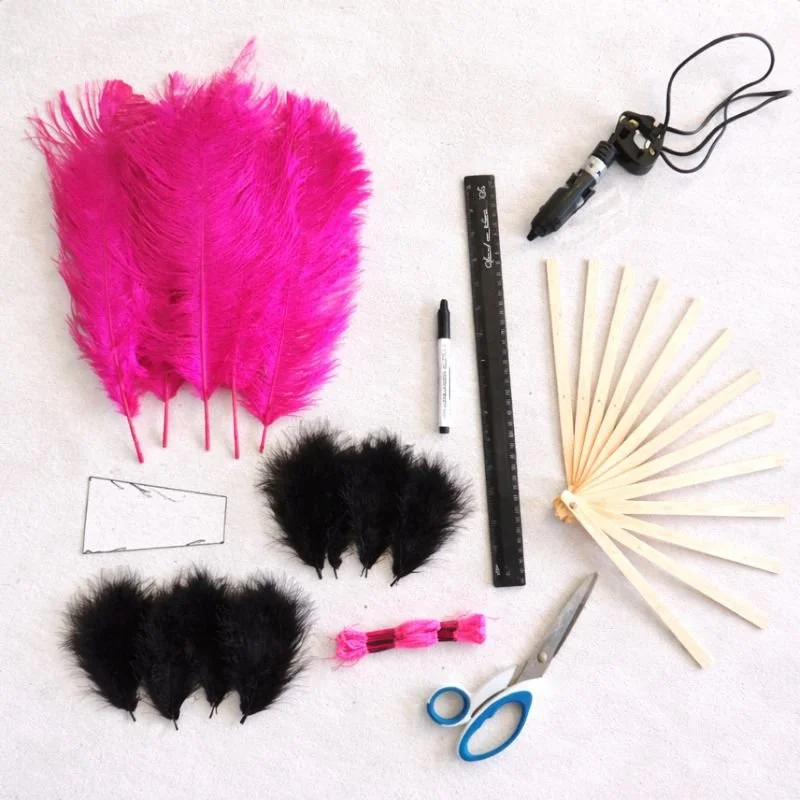
What You Will Need
Pair of nine staves
Glue gun and glue sticks
Marker pen
Ruler
Scissors
Eight black marabou feathers (10–15 cm)
Thirty-two pink ostrich feathers (40–45 cm)
Pink embroidery thread
Two A4 laminated clear sheets
Six A4 double-sided sticky sheets
Card template
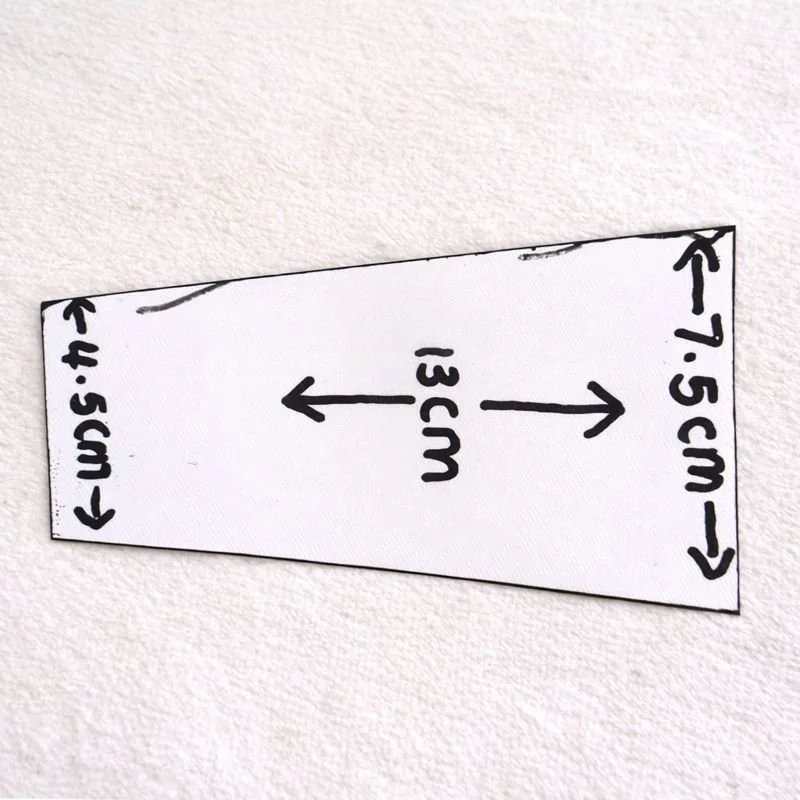
Card Template Size
The card template used for this fan set measures:
7.5 cm wide across the top
4.5 cm wide across the bottom
13 cm in length
You may use this template or choose a rectangular template if you prefer the same width at the top and bottom. The key to making a successful set of ostrich fans is preparation, so take time to prepare all parts before assembling the fans.
How To
You will need to cut 36 card templates from the A4 double-sided sticky sheets. If you draw carefully around your template, you should be able to get six templates from each sheet. Pic 1.
From the two laminated A4 sheets, measure and mark your widths using the marker pen. Cut strips from one sheet at 7.5 cm wide and strips from the other sheet at 4.5 cm wide. If you are using a rectangular template, both widths will need to be 7.5 cm. Each strip should be approximately 2 cm in length. Pic 2.
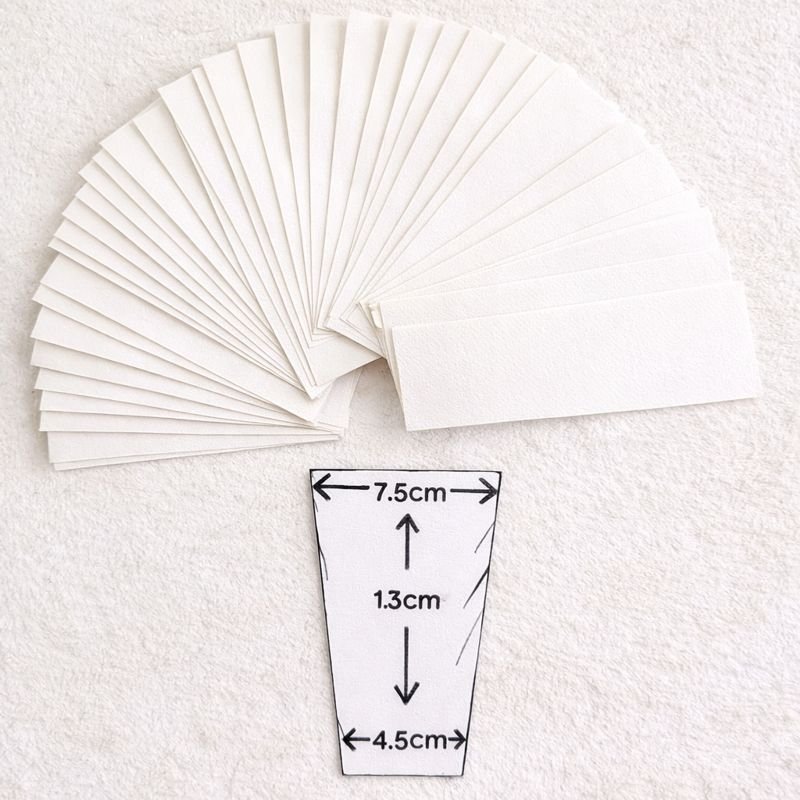
Pic 1
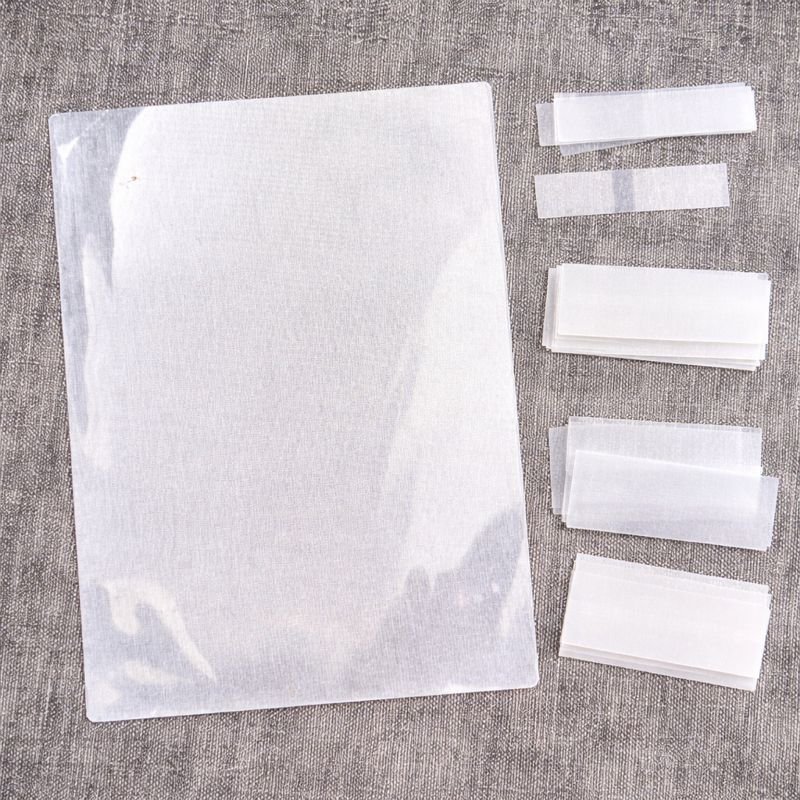
Pic 2
Marabou Feather Shapes
Using the templates cut from your sticky sheets and your marabou feathers, peel back one side of the sticky backing and press the marabou feathers onto the sticky surface, ensuring the feathers overhang all edges. Use small amounts of glue to secure the feathers in place.
You should now have shapes that look like pic 3.
Turn the marabou feathers over and, using the sticky shape as a guide, trim away the overhanging feathers along the bottom edge as shown in pic 4. You should now have marabou shapes that look like pic 5.
You are now ready to start assembling your fans.
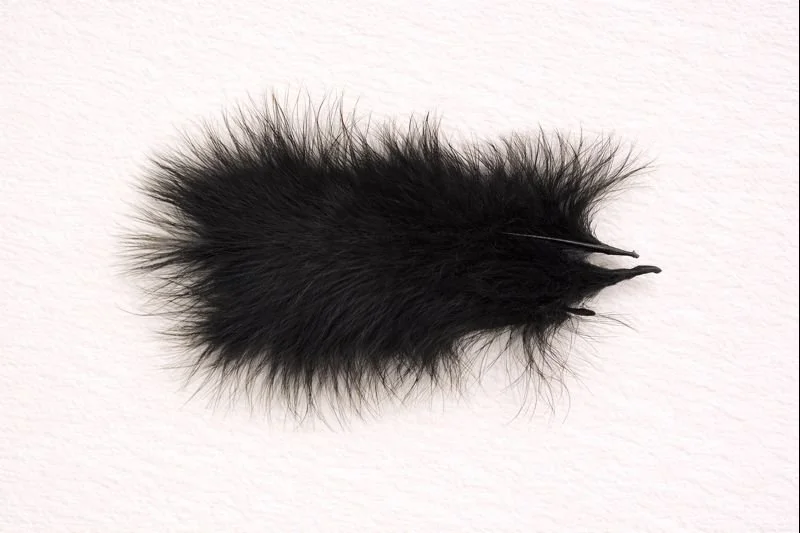
Pic 3
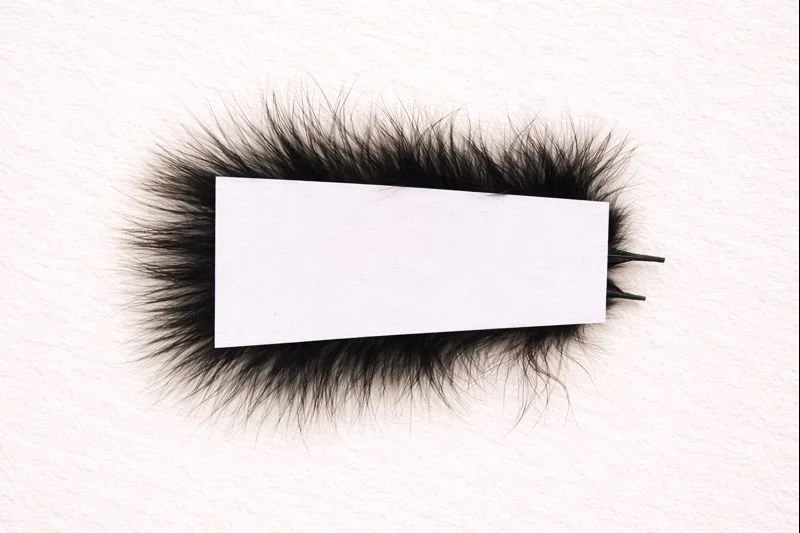
Pic 4
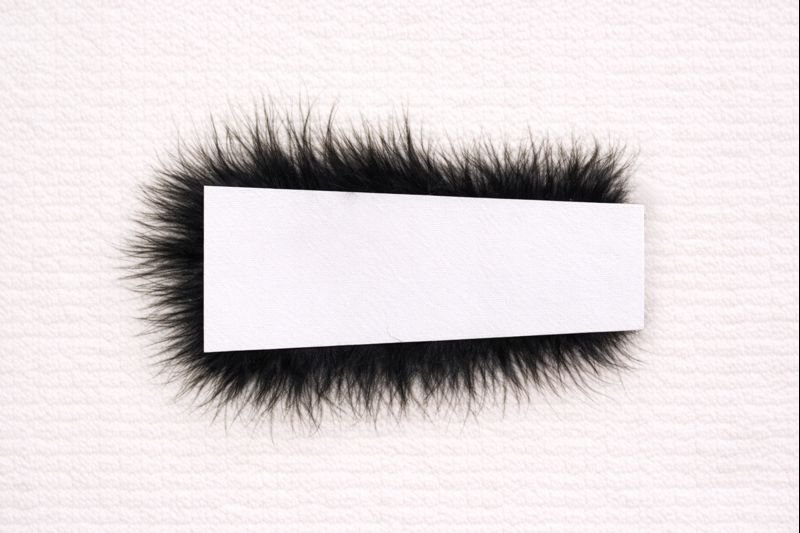
Pic 5
Assembling the Fans
Peel back the backing from one marabou feather shape. Using the plastic strips you cut earlier, place a 7.5 cm strip along the top edge of the marabou shape and press down firmly. Place a 4.5 cm strip along the bottom edge and press down firmly. Cut one of the 7.5 cm strips down by approximately 1 cm and place it in the centre of the marabou shape. Press down firmly. Be careful, as the sticky sheets can be fiddly to work with.
Using the glue gun, place a small spot of glue in the centre of each of the three plastic strips, where the X is shown in pic 6.
Take your first stave and line it up carefully so you do not cover the threading hole. Press it firmly into the glue, ensuring the screw head is at the top and the bolt is at the bottom.
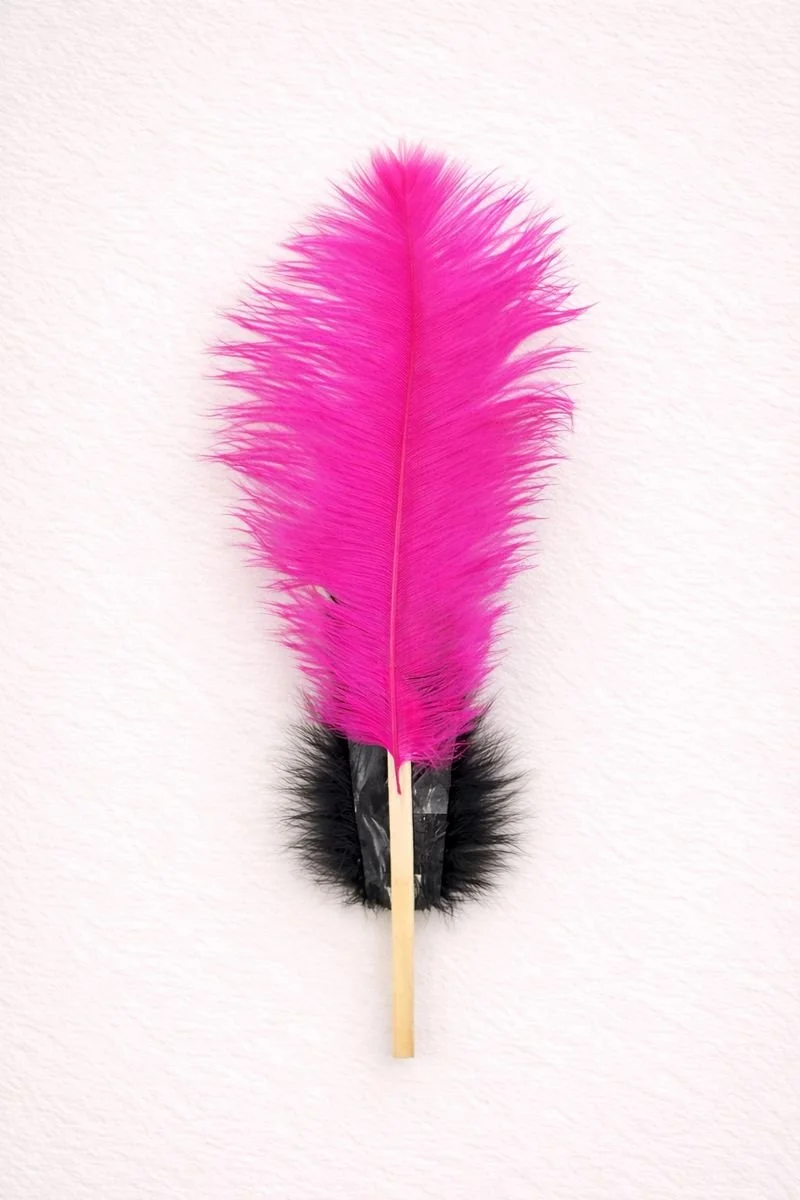
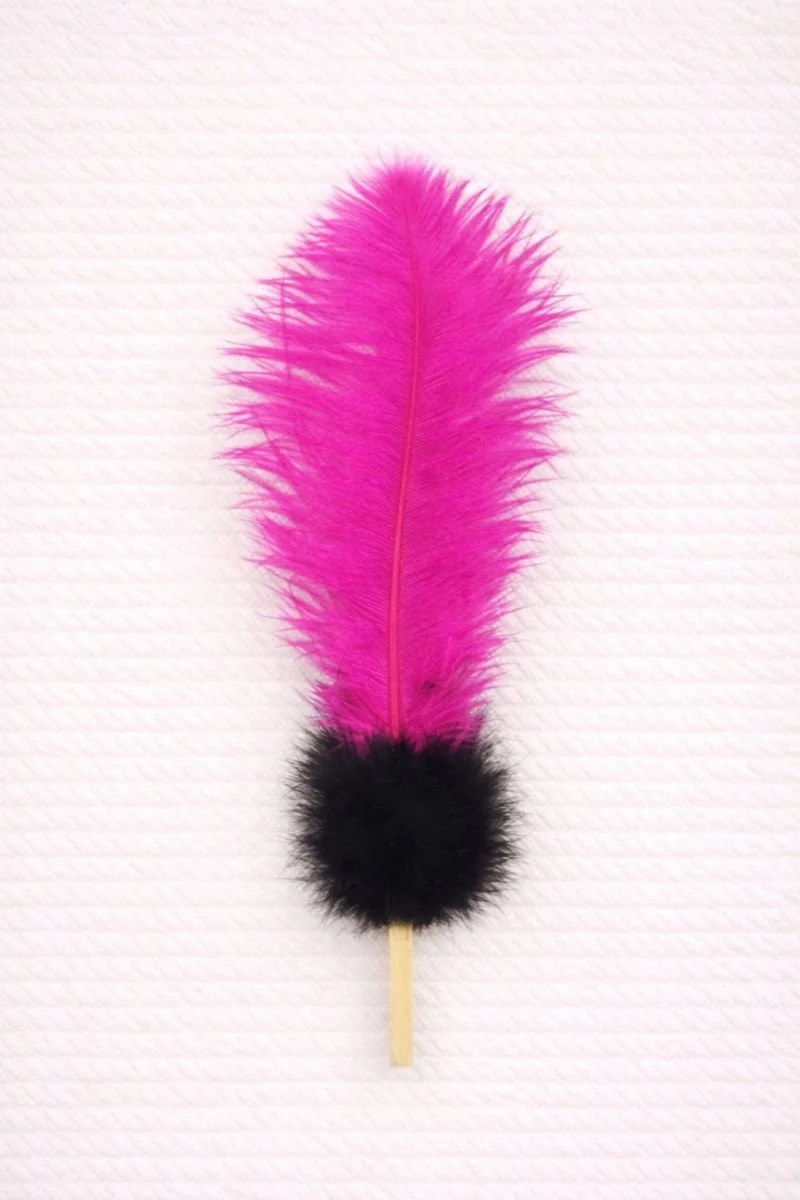
Apply glue along the stave and attach one pink ostrich feather, laying it flat against the stave as shown in pic 7.
Peel back the backing from another marabou feather shape and carefully place it over the stave and feather, lining it up neatly as shown in pic 8.
Peel back the backing from another marabou feather shape and attach the three plastic strips as before. Apply glue to the centre of each strip, again where shown in pic 6.
Line up your second stave, ensuring the threading hole is clear and the bottom corners of the marabou shapes align. Press the stave firmly into the glue.
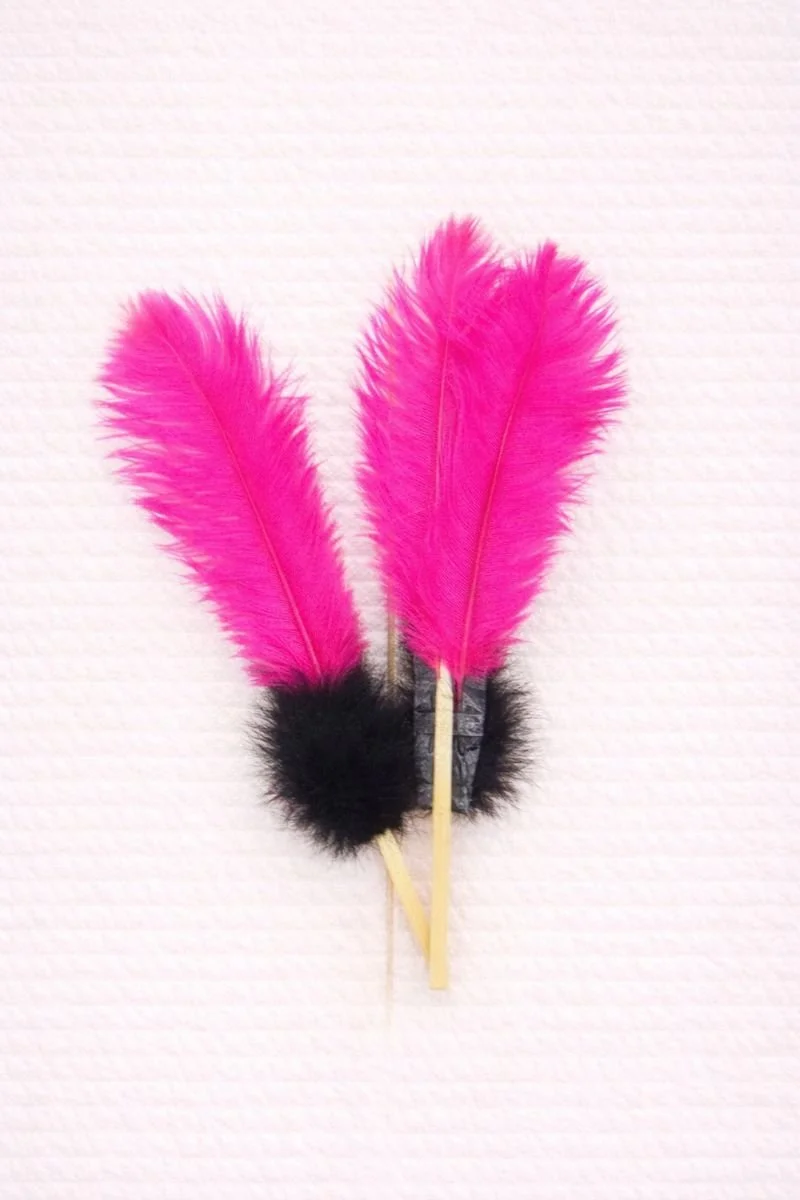
Apply glue either side of the stave and attach one pink ostrich feather to each side as shown in pic 9.
Peel back the backing from another marabou feather shape and place it over the feathers and stave, sealing everything together as you did with the first stave.
Repeat this process six more times using two feathers for each stave.
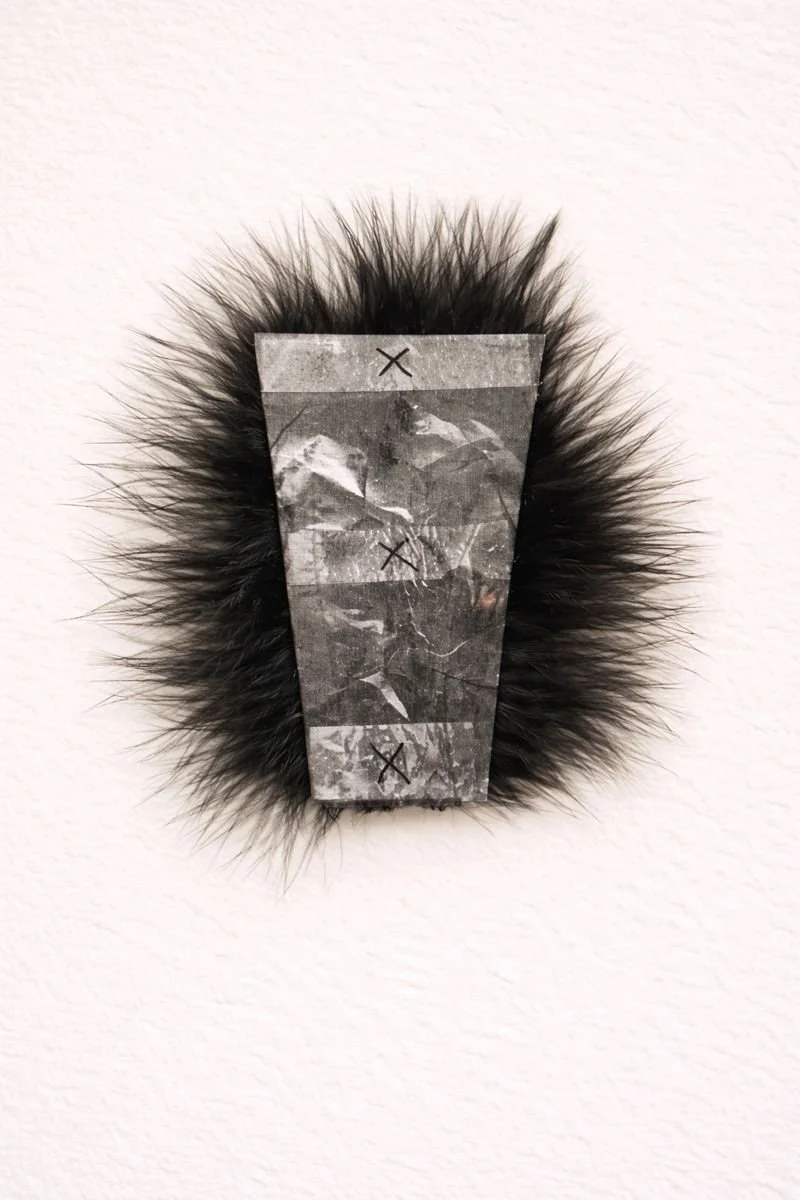
Pic 6
Pic 7
Pic 8
Pic 9
On the final stave, use only one pink ostrich feather, matching the first stave you started with. You should now have a completed fan like pic 10.
Creating the Second Fan
Repeat the entire process using your second set of staves. Make sure the bottom corners of the marabou shapes align with the first and last staves of your completed fan. Ensure the ostrich feather height also matches and that the screw head remains at the top with the bolt at the bottom.
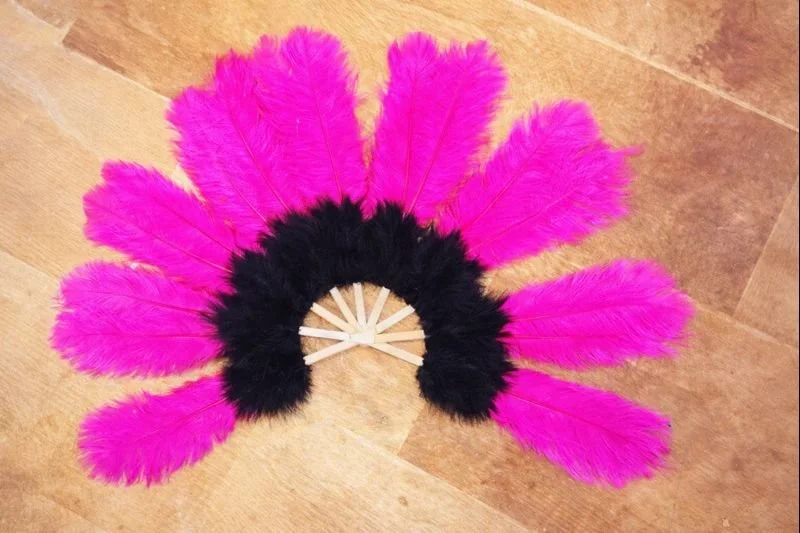
Once finished, you should have two fans that look like pic 11.
Pic 10
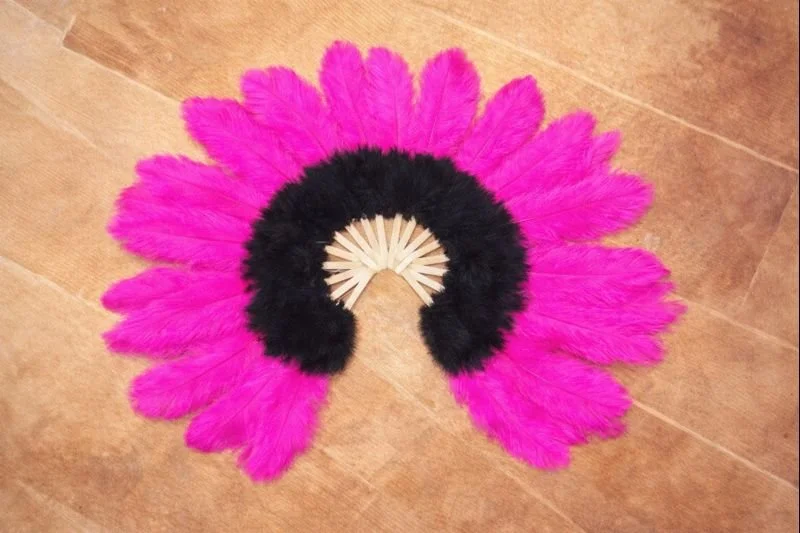
Pic 11
Threading Your Fans
Cut approximately 50 cm of pink embroidery thread and thread one end through a needle.
Turn your fans over so the bolt is at the top and the screw head is at the bottom. You will notice the tips of the ostrich feathers curling inwards.
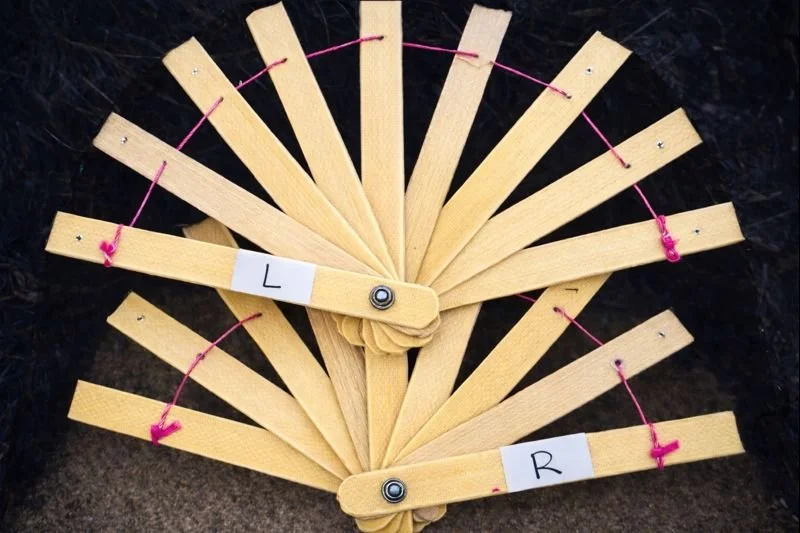
Arrange the staves so one fan opens to the left and the other opens to the right. Pic 16.
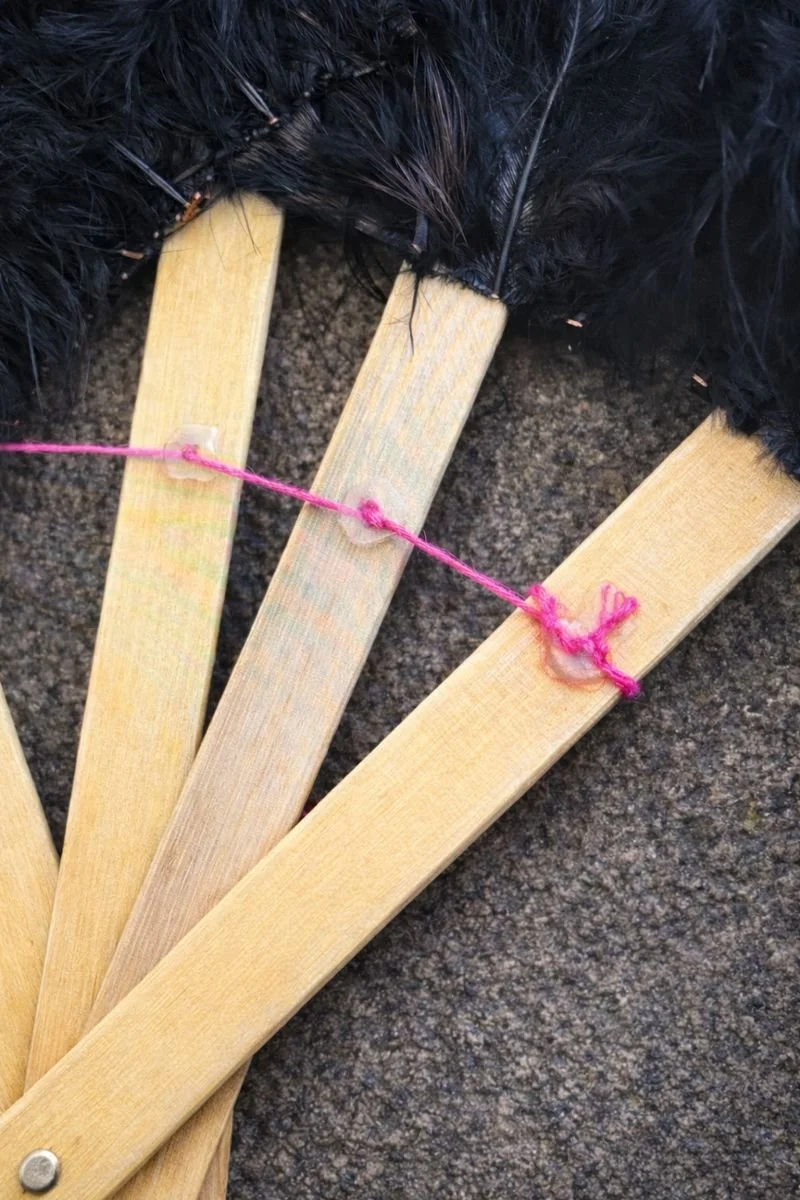
Push the needle through the hole of the first stave from the bottom and tie a knot at the end of the embroidery thread as shown in pic 12.
Feed the needle back through the same hole as shown in pic 13, then continue threading through the holes of all nine staves as shown in pic 14.
Once all staves are threaded, spread them evenly so the black marabou shapes slightly overlap. Tie a secure knot and trim away any excess thread.
Repeat this process for the second fan.
Using the glue gun, place a small spot of glue over each hole on both sides of every stave to secure them and prevent movement. Pic 15.
You should now have two fans with staves opening in opposite directions, as shown in pic 16.
You may wish to label your staves left and right so you can easily identify them when performing or working with a stage manager. Pic 16. This can be done using paper and tape or a marker pen.
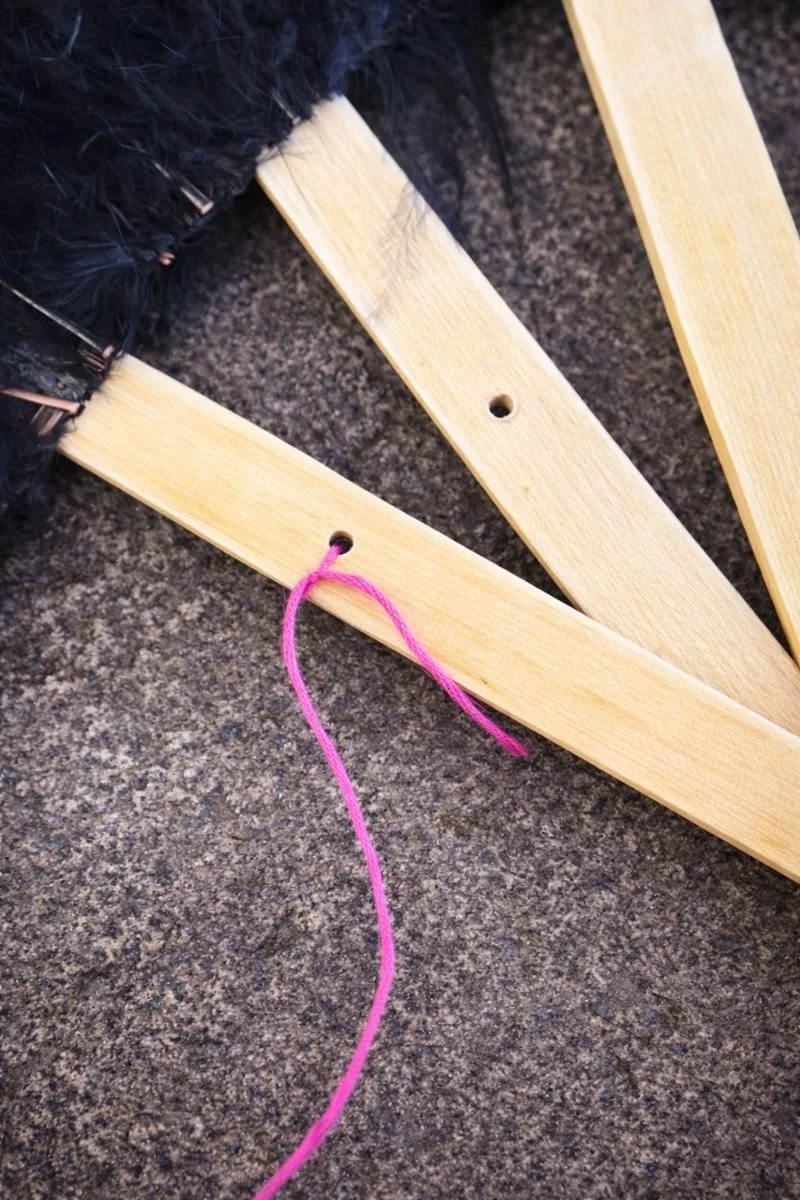
Pic 12
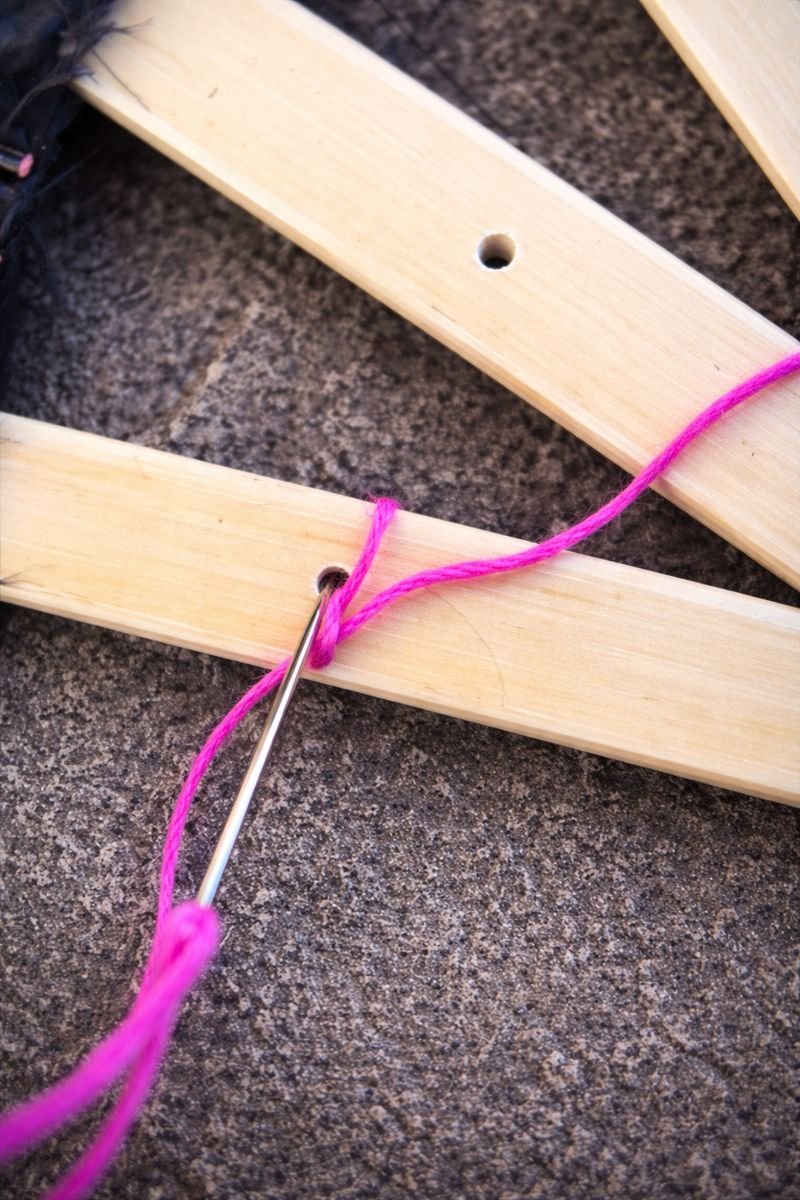
Pic 13
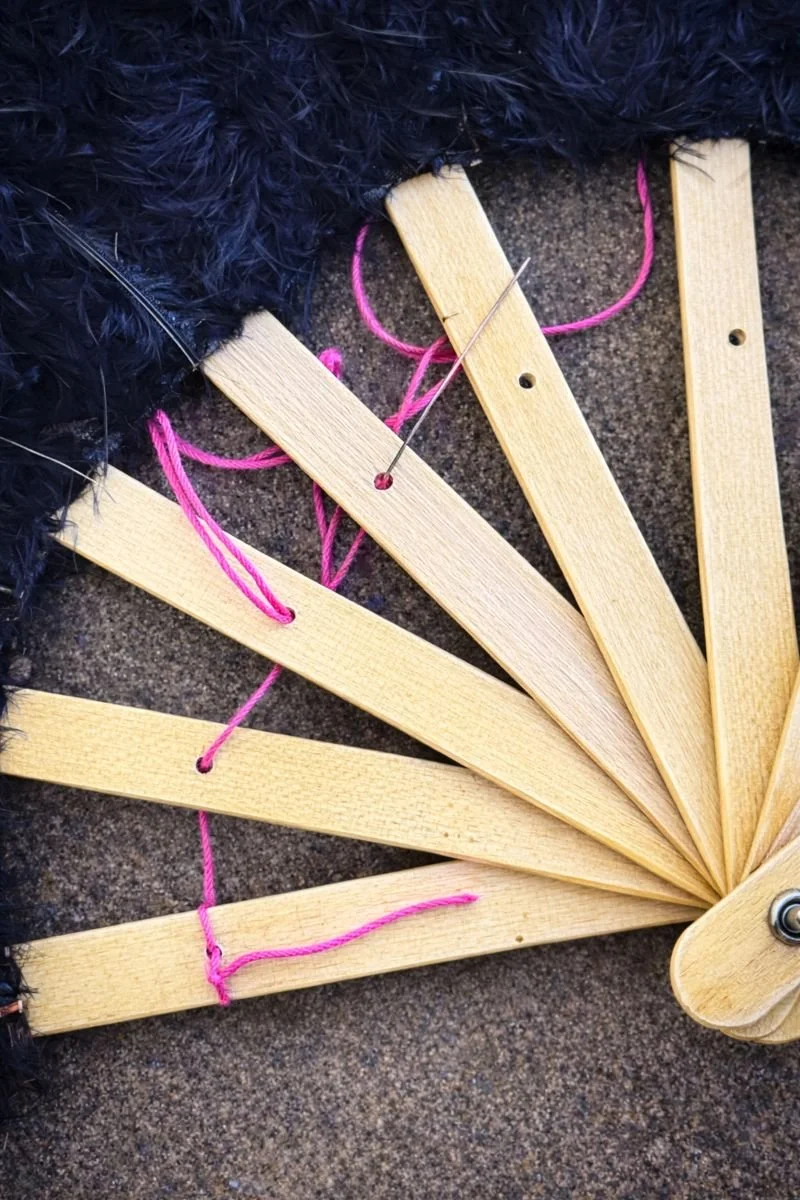
Pic 14
Pic 15
Pic 16
Voila. You now have your very own handmade set of ostrich feather fans, ready for you to practise, perform, and dance with confidence.
Creating your own burlesque props is not only cost-effective but also deeply rewarding, giving your performance a personal touch that is uniquely yours.