
DIY Burlesque How to Create Vintage Inspired Hair Rolls
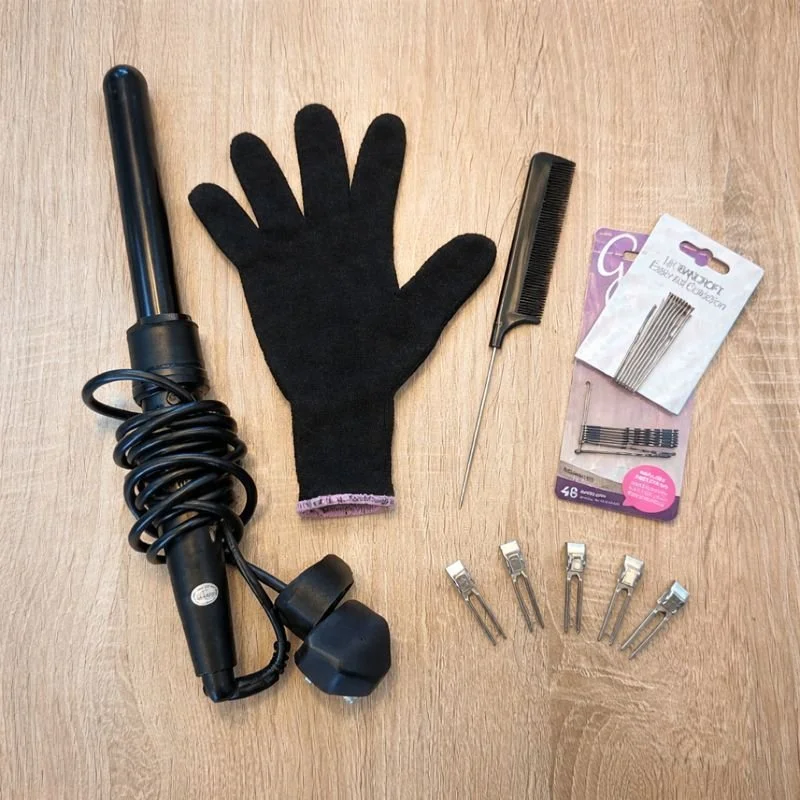
What You Will Need:
Curling Wand
Heat Proof Glove
Hair grips
pin curl clips
tail comb
You should also use heat protectant spray before curling and hairspray if needed to hold the style in place at the end.
1) Start with brushed-out hair. It works better on day 2-3 hair as freshly washed hair can be a little too soft for the curls and rolls to stay in place. Apply heat protectant all over your hair.
2) Curl all of your hair in approximately 1-inch sections starting from the bottom using the curling wand pointing downwards and wrapping the hair around the wand away from your face. Hold there for a few seconds and gently release your hair from the wand. You will start seeing your curls like in picture 1.

Picture 1

Picture 2

Picture 3
3) While the curl is still warm roll it up in the same direction that you curled it in, towards your head, and clip in place near the root with a pin curl clip like in picture 2. Continue this for the rest of your head and leave the curls to cool down.
4) Once your hair has cooled down you can start to remove the pin curl clips and gently release the curls. Start removing the clips from the bottom where you curled your hair first.
5) Once all the clips have been removed you are going to make a side parting in your hair at the top. This is to create the sections which will become your rolls in. Use the tail comb to create a section from your parting to the top of your ear on both sides like in picture 3.
6) You will then take the section at the front which you have just made, comb it upwards and hold it towards the end of the hair like in picture 4, and backcomb behind a little to help create volume and help it stay in place.
7) You will then gently comb the front smooth and roll the section starting from the end towards your scalp in the same direction as you curled away from your face. Once you are happy with the roll use the hair grips to pin it in place from either end of the roll until it feels secure. Repeat on the other side if you want a roll on both sides.

Picture 4

Picture 5
8) You then very gently use your comb to smooth the top of the rolls backward and use a little hairspray to help keep them in place like in picture 5.
9) For the rest of the curls, you comb them through and use your fingers to wind them into bigger clumps of curls for a more vintage look. Last of all give a light spray over your hair with hairspray to hold everything together and tame the wispy stray hairs.
Voila! You now have your own vintage-style hair rolls!

You can also use rollers to create this style, it’s the same principle, just use the rollers on damp hair, away from your face in the same way you would roll up and clip the wand curls (like in steps 1 - 3) and leave to dry then continue the rest of the steps.
It may take a little practice to perfect the rolling because it can be very fiddly to do at first but practice makes perfect and sure enough, you will looking like a Vintage Hollywood Bombshell in no time.